Homemade Gothic Christmas Ornaments with Sara’s Soaks!
Our guest today is Sara from Sara’s Soaks talking about making homemade gothic Christmas ornaments. They’re really cool!
Take it away Sara!
Sara: We have decked our halls with black and red for a very Gothic Christmas. I will tell you I’m not exactly a planner. My family thinks I am but I’m very much a wing-it sort of person. I just have enough of a plan so I can figure out the direction I want to go in but everything else just falls into place.
I will, also, say that while I’m a creative person, I’m not a great crafter or artist. I seem to always produce something that looks like a preschooler put it together. When something comes out looking a little more mature then I have to share.
Back in November, the plan was for the same old Christmas decorations that we do every year. I just wasn’t as inspired as I had hoped. Then I read Hopeless, Maine . The art is amazing. It’s dark and bleak but there’s something about the art out of context that offers this irony that I wanted to capture. I wanted to make something with that art.
I saw a collection of gift tags on the Tim Holtz blog and got to thinking. The work was steampunkish but so classic. I wasn’t sure how I’d recreate those tags and still incorporate the Hopeless, Maine artwork.
I don’t have a lot of supplies so I went to the local scrapbooking store and found a stencil of gears (around $5). I figured for that price I could learn something.
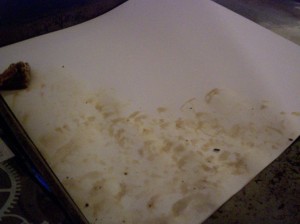
I wanted an end result that was aged and yet crisp. I started with white cardstock in 12×12. Then I took a plain black tea bag, got it wet and dabbed it on the paper.
The tea gave the paper an aged look. Any time you add something really wet to paper, it will warp it. That’s easily fixed, to a degree, with a quick ironing.
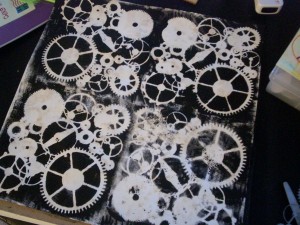
From there, I painted on the stencil with black paint.
I played with how dark I applied the paint. I actually think the bottom right corner is my favorite since the gears are less perfect than the other corners. All this work was for the background so it didn’t need to be absolutely perfect.
I don’t have pictures of the next step but it’s easy to imagine. I collected all the pictures I wanted to use in a word file then printed with a laser printer. If you have an ink jet printer, then I recommend getting the pictures photocopied. Ink jet printers lay the ink on the paper and run when applying glue or paint.
I printed in black and white then added color with colored pencils. Most of the Hopeless, Maine drawings are in black and white or sepia tones so this didn’t take anything away from the pictures. I started with just adding color as it was in the original but some pictures I added just a little more color such as pink for lips or blue for eyes.
From here, I raided my craft supplies – cardstock in a variety of colors, ribbon, beads, scrapbooking die cuts. I looked for anything that might go with what I was making, which at this point was still in question. I had originally thought book marks but as I sat down to put it all together, I knew I was making Christmas ornaments. I didn’t really have high expectations for these, but they actually turned out quite nicely. One of my friends even said that she thought I should consider selling some online. I’m not too sure about that, but she said that I could make a Shopify store and sell them on there. Apparently, you can even get help with marketing too by visiting websites like https://victoriousseo.com/verticals/shopify-seo/. My friend said they can use search engine optimization techniques to attract more people to your Shopify page, hopefully resulting in more sales. That’s something I’ll have to think about. I was, originally, making them for my home.
At this point, I have few instructions since all I did was cut cardstock and layered it under the pictures. I didn’t use as much of the gear paper as I had thought I would.
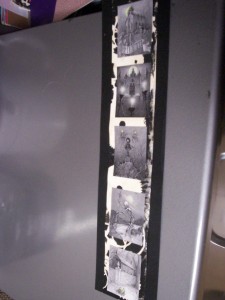
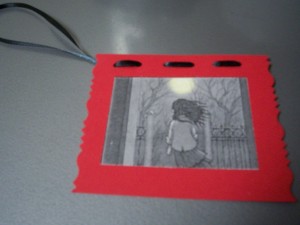
This row of pictures became my smallest ornaments. I cut in between the pictures and then added the ribbon.
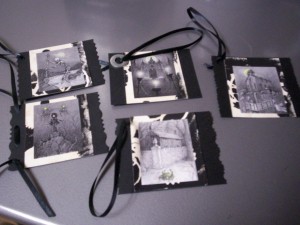
Because they were small, I used decorative scissors to make the edges. And for the one in the middle, I added a metal washer. I had envisioned more washers until I found that I only owned the one metal one. You may notice some black washers on some of the ornaments but they didn’t add as much as I would have liked.
I did weave some ribbon through some of the cardstock. To do this – use a hole punch to make holes at even-ish intervals. You’ll notice I added a bit of tape to the end of the ribbon –this helps when weaving through several holes. For one or two, I didn’t bother with the tape.
This one is my favorite – it just looks like a Christmas decoration. I took this picture before the beads were threaded on the end of the ribbon. I used clear pony beads as accent.
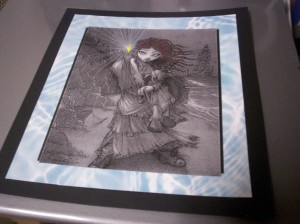
I just love Salamandra’s hair. It’s always so wild. This picture was so large, I ended up framing it in an 8×11.5 frame. It’s going to become part of the permanent collection after the holidays.
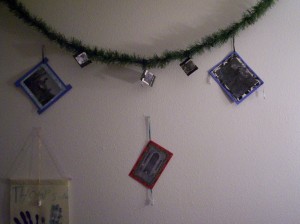
Here they are at the start of our decorating. We don’t have space for a tree so all our ornaments hang on and around lighted garland that hangs around our living room.
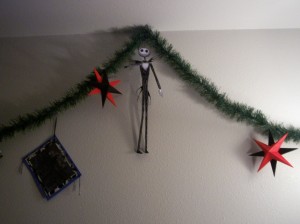
We added some black and red stars and Nightmare Before Christmas ornaments (printed from the Disney website).
Now because the book is just coming out in time for Christmas, I want to put out a small plug for Hopeless, Maine by Tom and Nimue Brown. It’s a dark, steampunkish graphic novel set on a mythical island off the coast of Maine. Take a minute to check out their website and see what it’s all about. http://www.hopelessmaine.com/

One Comment